Sorry everyone, my hard drive crashed this weekend so I'm unable to post until my new hard drive comes and I can get Windows installed on it. I'm having computer withdrawal. Can't wait to be back blogging!
Wednesday, November 14, 2012


Sunday, November 11, 2012
Sassy Lacquer - Nutty As A...
So umm....yeah, I took these pics and was supposed to post them earlier, but I got busy...so here we are! This is 1 coat of Sassy Lacquer Nutty As A... over my previous manicure of Zoya Midori and Cult Nails Nevermore. It has gold micro-glitter and matte red, green, and purple hexes in a slightly tinted base. The slight tint of the base only affects pastels and white underwear.
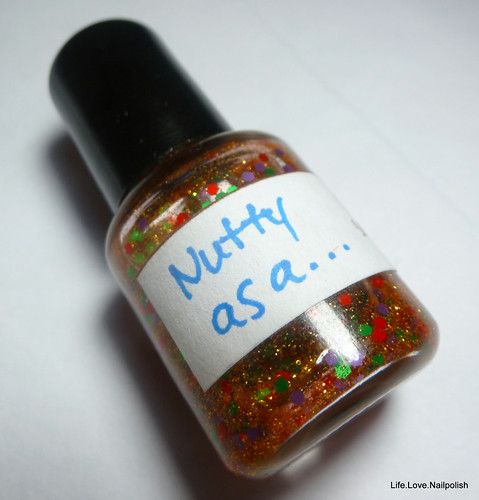
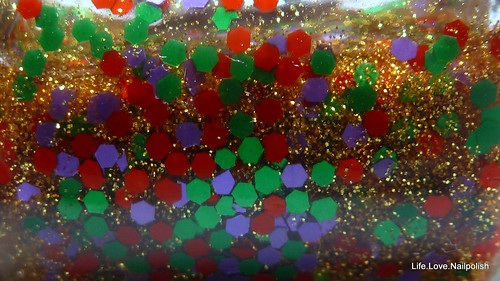
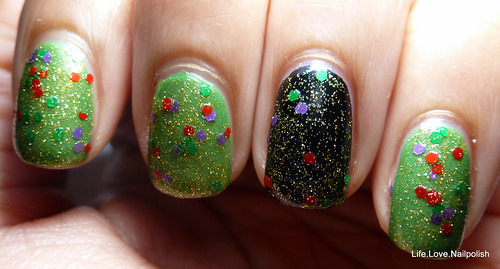
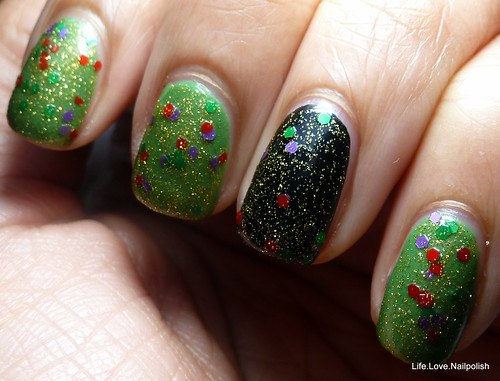

So, is it any good? Of course! I usually have a problem applying glitter polishes from mini bottles, but I didn't have to fish for glitter or dip my brush back in the bottle to finish a nail. I didn't apply any topcoat here, but from the feel of my nails, I'm sure it would be smooth with one coat of Seche Vite or Wicked Fast. So my verdict - if you're looking for a great Christmas topper polish, I'm sure Nutty As A... will not disappoint. I'm dying to try it over red and gold...but right now, I'm loving it over black, and it even looks great over hot pink! You can purchase it and other great quality indie polish here.
Happy Polishing (and get shopping!),
J
Wednesday, November 7, 2012
Zoya Midori
I meant to use this polish a long time ago, I really did. I just got caught up with other polishes. After all, I do have over 800 polishes in my stash...I really need to destash. I wore Midori with accent nails of Cult Nails Nevermore, my all time favorite black. It dries so shiny and it's so sexy! Seriously, as pretty as Midori is, I couldn't stop staring at my nails that had Nevermore on them.
 |
| Both polishes together. |
 |
| The deliciousness that is Midori! Look at that gold shimmer! |
 |
| As if you weren't already drooling over this polish... |
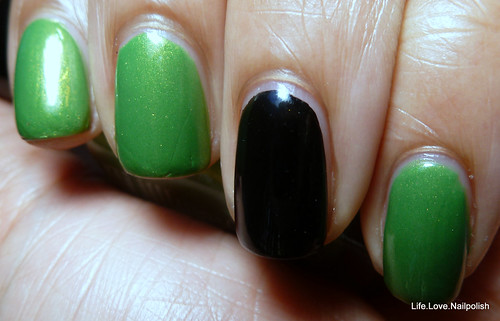 |
| Check out the clean gap on my black nail! Ok...back to the polish now. |
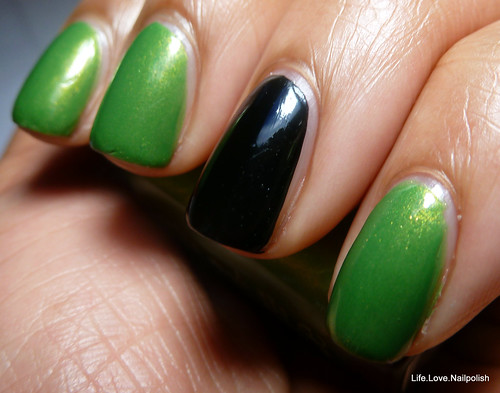 |
| Golden shimmer....ermahgerd!!! |
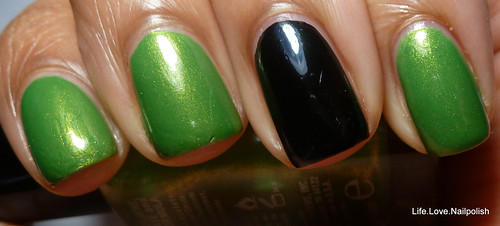 |
| Ignore the weird tipwear and just enjoy the polish. |
Happy Polishing,
J
Tuesday, November 6, 2012
Zoya Nidhi
Happy Voting Day! Hope you're heading out to the polls and exercising your right to vote! It just so happened that I painted my nails red, so it worked out perfectly for today's post. I bring you Zoya Nidhi, which is a gorgeous glass-flecked red that only took 2 coats for full opacity. I have a feeling that if your nails are longer though, you may need 3 coats. Enough blabbering from me, pictures!
 |
| That is one delicious bottle shot, if I say so myself. |
 |
| I know you wanted to see this macro...look at those flecks! |
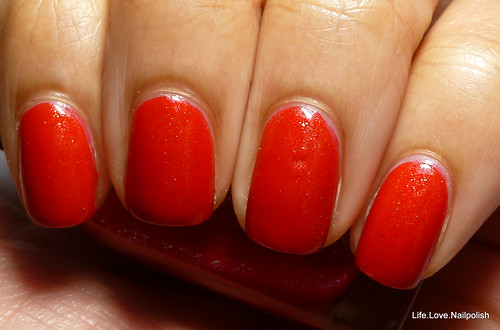 |
| Of course, I wouldn't be able to capture the pink flecks on my nails. |

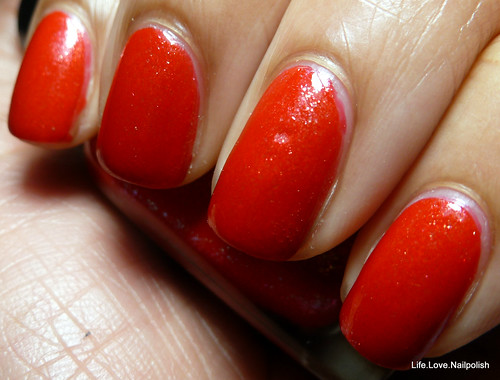

Ok, that's enough pics for now, so I hope you enjoyed this, and if you're a fan of red polish, Nidhi is a must-have! It's gorgeous!
Happy Polishing,
J
Monday, November 5, 2012
Failure Sailor
Sooooo...nail fail time! I had a costume party to attend this weekend, and I wanted to do nautical nails to match my sailor costume. Well, when you can't find any of your nail art supplies, it's pretty hard to execute the idea I had in my head..that, and my striping brush was fraying. So I bring you this nail fail!
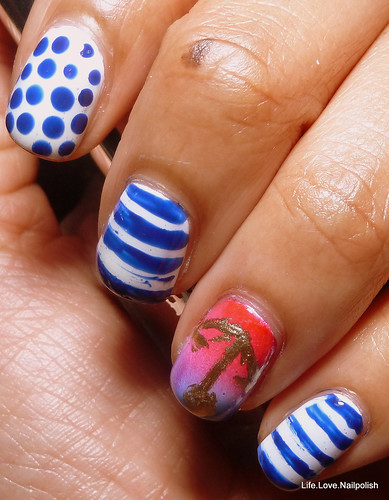
Even my dots were uneven. And that gradient looked way worse in real life. My cleanup was sloppy, probably because I hated how this came out, but still sloppy.
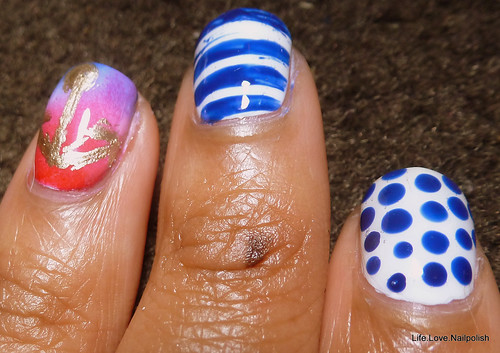
Promise my cleanup didn't look this bad in real life. Oh macro, why do you hate me so? That's it for this post, and since I posted mine, why don't you tell me about your most recent nail fail in the comments?
 |
| Bonus pic: My friend took this while we were at In N Out the other night after a costume skate party. |
Happy Polishing,
J
Friday, November 2, 2012
Gradient & a Mini Tutorial
So yesterday I showed you China Glaze Something Sweet...here's what I did with it! A pastel gradient!
Some of the lovely ladies in one of my polish groups were trying to figure out how to get that smooth gradient look, so I volunteered to take pics of me doing one. Before you start, be sure to have painted on your base color already and make sure it's completely dry.
Some of the lovely ladies in one of my polish groups were trying to figure out how to get that smooth gradient look, so I volunteered to take pics of me doing one. Before you start, be sure to have painted on your base color already and make sure it's completely dry.
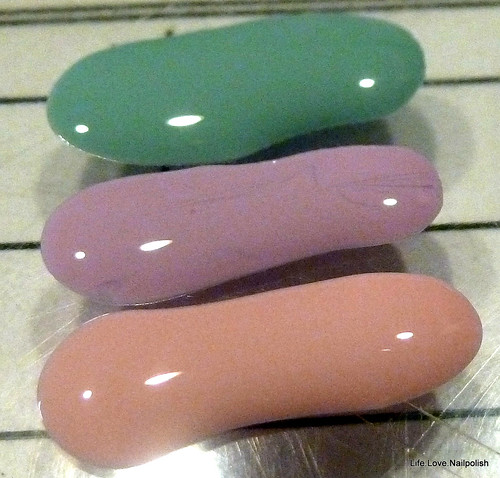 |
| Step 1: Apply your colors to the surface you're working on. I'm using all China Glaze - Kinetic Candy, Sweet Hook, and Something Sweet. |
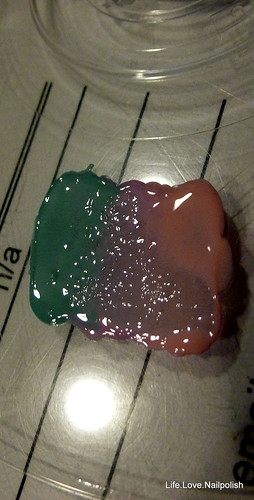 |
| Step 2. Use a clean end of a dotting tool (or toothpick, or bobby pin) to blend the colors together where they meet. Use a clean end for each color transition. |
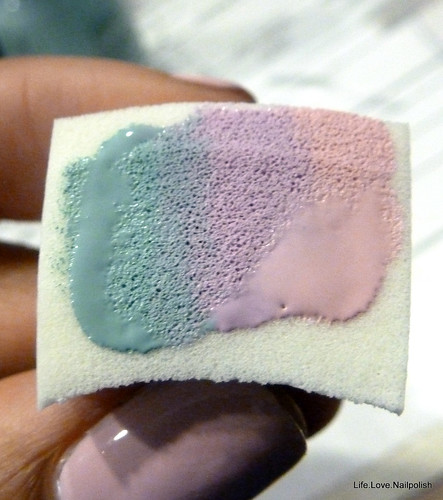 |
| Step 3. Dab your sponge in the polish once. |
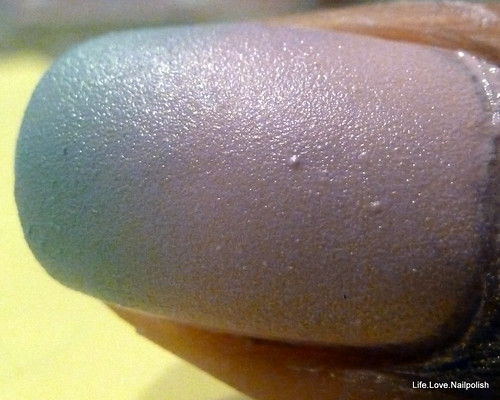 |
| Step 4. Dab the sponge on your nail in the orientation you want your gradient to be, being sure to dab a few times slightly back and forth to help the colors blend even more. |
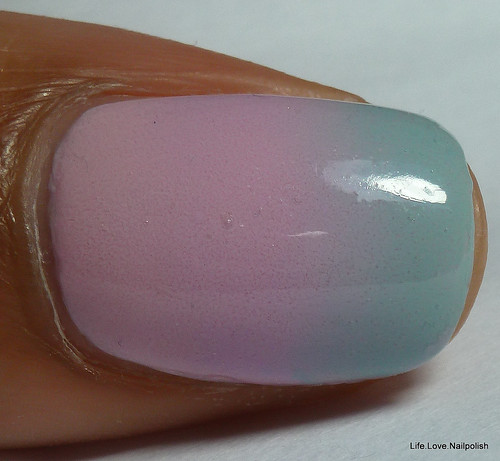 |
| Step 5. Cleanup and topcoat |
- If you want the smoothest gradient, use a sponge with the smallest holes. I used Rite Aid brand cosmetic wedges.
- Don't try to "stamp" multiple nails without redoing the polish gradient on the sponge. I tried on my pinky, and I got sponge lint stuck to it...and it wasn't smooth at all.
- If you want the tip color (or wherever you put the brightest color) to be brighter, paint directly on the sponge. I tried this on my right hand and I still got a smooth gradient, but the blue (Kinetic Candy) stands out more.
- Use 3 colors. I know you can barely see the purple, but if it weren't there, I don't think the pink and blue would blend as smoothly.
- Have fun!!
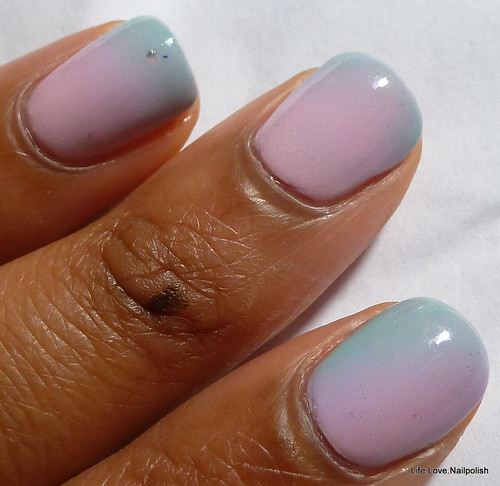 |
| Left hand. You can see where I jacked up my gradient on my ring finger when I tried to get a piece of debris out of my polish. |
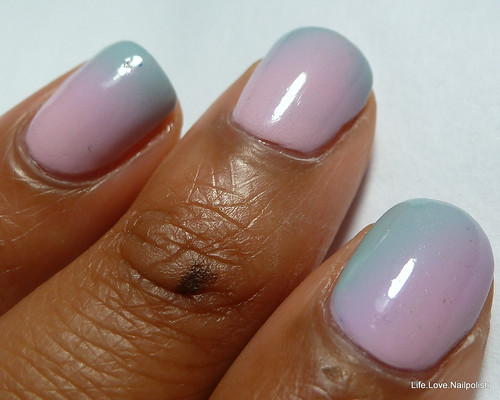 |
| Left hand again. I did the gradient on my index at an angle, just to show you don't have to do it straight. |
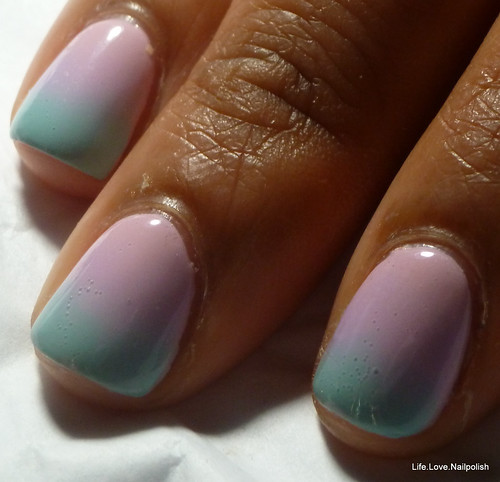 |
| Right hand. One of the few times you'll see it, but just wanted to show that the blue came out much richer here when I painted directly on the sponge. You can even see a little of the purple! |
Happy Polishing,
J
Thursday, November 1, 2012
Something Sweet
I meant to post this up before the end of October, but I didn't get around to it, but it's ok, right? We should be concerned with Breast Cancer Awareness (and other cancers as well) all year round. So today I'm showing you China Glaze Something Sweet in 2 coats. Beautiful formula, thin and great flow, opaque in 2 coats.
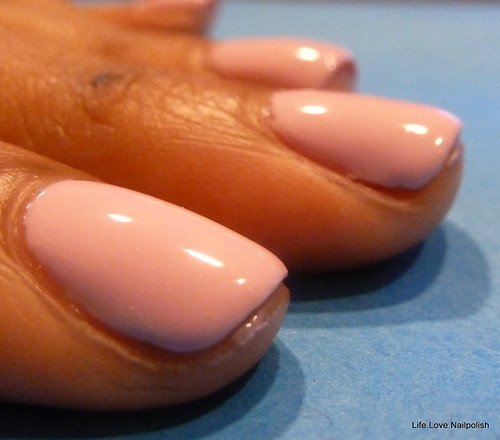 |
| No cleanup, I wasn't done with the mani yet. |
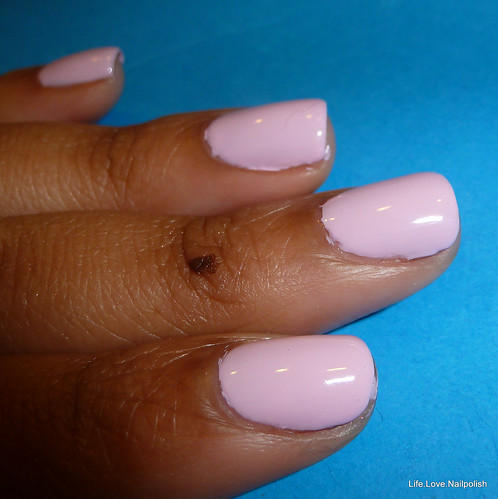 |
| The color is more accurate on a blue background with the flash on. |
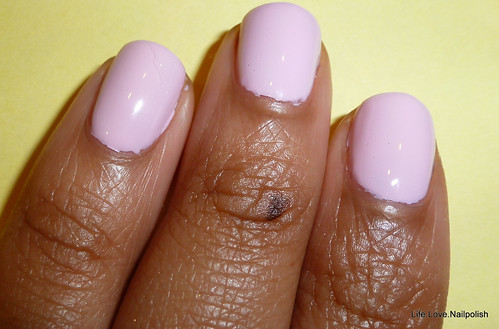 |
| See, the yellow background washed the color out! |
Happy Polishing,
J
Tuesday, October 30, 2012
2 Pretty Polishes...
Don't always make a pretty combo. Last week, I had gotten a few Jade polishes in the mail and decided to use one in conjuction with Lynnderella Golden Rules. First up, a terrible picture of Jade Mystic Gold by itself:
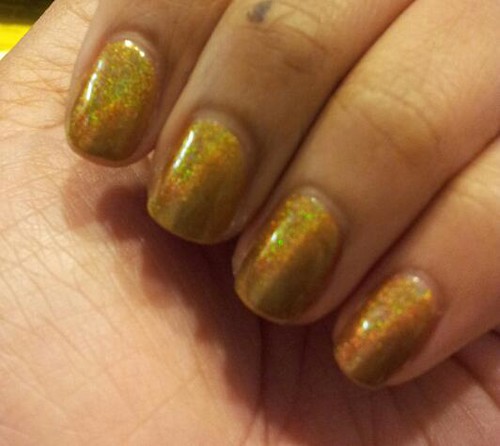
It's way more holo in real life. But it's pretty close to the color of mustard...holographic mustard? Hmmm... this was 2 coats, but it was almost opaque in 1.
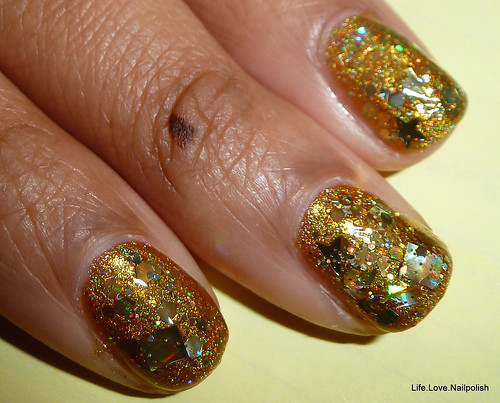
My index finger has one coat, and my other nails have 2 coats of Golden Rules. I think I was trying to channel the creative layering skills of Cathy at More Nail Polish, but I think I failed here.
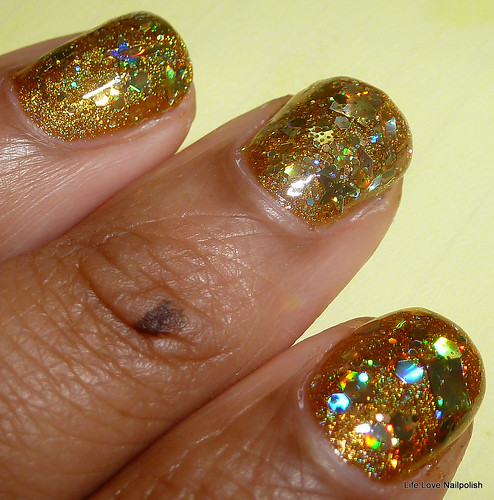
This is a really packed glitter, I should have only used one coat. It took a lot to try and smooth this out...and it still wasn't completely smooth after two coats of Glitter Food.
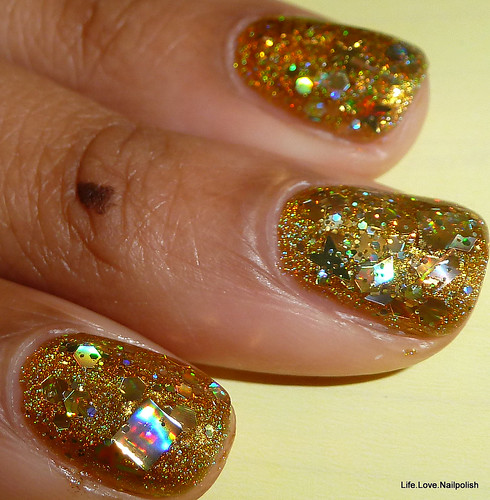
I do have to say though, the blurred holo on my ring finger looks amazing. Also, the girls I tutor on Fridays really liked this. They thought my nails were fake...even though they are so short! As you can probably tell, I did not do cleanup because I did these late at night, but both polishes applied pretty well, and I didn't do too much fishing for glitter. Next time, I think I'll use a cooler toned gold if I decide to go with a gold base again.
Happy Polishing,
J
Monday, October 29, 2012
Happy Birthday...to me!!
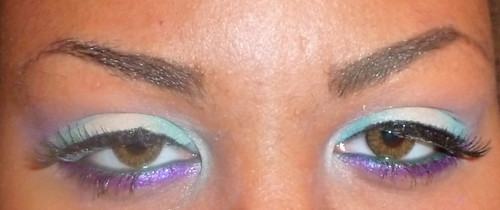
Yes, it's my 23rd birthday, and I have no polish on except for Duri Rejuvacote. My nails are so bad, I finally decided to try Rejuvacote out, and I think it may be my perfect strengthener. It's only been 4 days though, so that may change, but my nails are already less bendy. I have no idea what's been causing the peeling and softness though. Anyway, I decided to come show you one of my fave makeup looks I've done in a while, because I still don't know what makeup I'm wearing today, but that's ok.
So the breakdown of what I'm wearing:
Inner & Outer Thirds of Lid: Sugarpill Mochi
Center of Lid: Tarina Tarantino Sparklicity Nude (used with Fyrinnae Pixie Epoxy)
Inner Eye Highlight: Silk Naturals Fire
Lid/Crease Blending Color: Sugarpill 2AM
Waterline: Tarina Tarantino Spark of Envy Hyperliner
Lower Lashline: Fyrinnae Sennyo foiled with Pixie Epoxy
Lashes: Ardell Wispies
So the breakdown of what I'm wearing:
Inner & Outer Thirds of Lid: Sugarpill Mochi
Center of Lid: Tarina Tarantino Sparklicity Nude (used with Fyrinnae Pixie Epoxy)
Inner Eye Highlight: Silk Naturals Fire
Lid/Crease Blending Color: Sugarpill 2AM
Waterline: Tarina Tarantino Spark of Envy Hyperliner
Lower Lashline: Fyrinnae Sennyo foiled with Pixie Epoxy
Lashes: Ardell Wispies
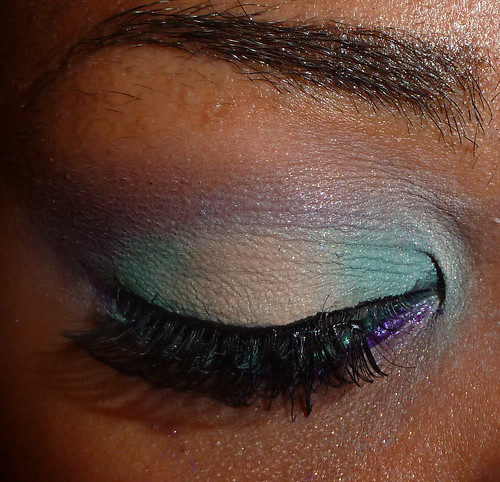 |
| I could not get a good shot of my eye closed, sorry!! |
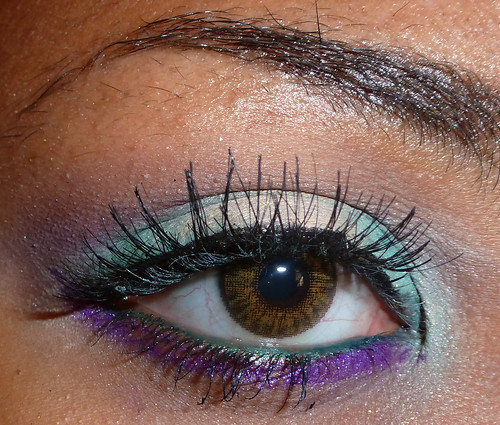 |
| Love how subtle the purple in the crease is! |
 |
| Kinda blurry, but I love how it makes it look ethereal! |
Happy Polishing,
J
Monday, October 8, 2012
Another She-Who-Shall-Not-Be-Named Glitter?
Yes, I bring you another Lynnderella glitter today. Why? Because they're pretty and I like them on my nails. As many have said, the drama is ridiculous, but goodness she can make a good glitter! Today's glitter is Shapeshifter. I layered it over 2 coats of China Glaze Re-Fresh Mint because originally, I was gonna layer Attitude Adjust-mint on top, but I really wanted all those shapes from Shapeshifter on my nails. So you'll only be seeing 3 of my nails today, since the PVA base coat works a little too well at removing glitter, and now I can't keep it on my nails. I promise it's still pretty though. But it needs at least 2-3 coats of topcoat to keep it smooth, so my nails were rather thick.
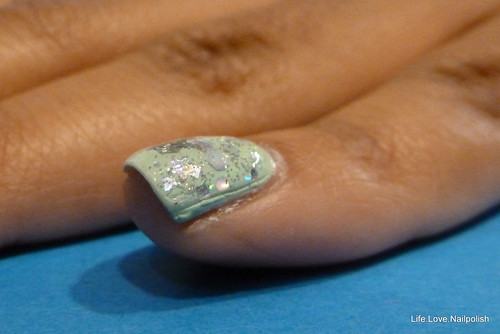
Look at how thick that is! And apparently my elementary skills at applying Seche Vite...I haven't used that topcoat in a while.
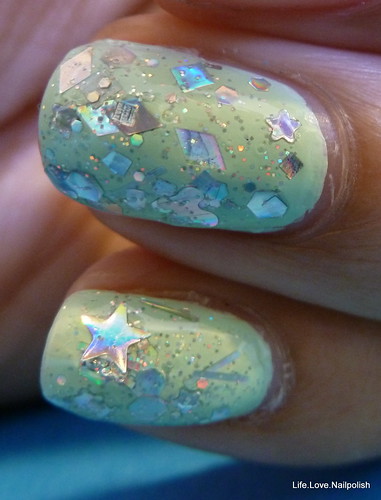
Look at all those pretty holo shapes!! Butterflies, hexes, big stars, little stars, diamonds, bars, squares, and even holo micro-glitter! I could not stop staring at my nails!
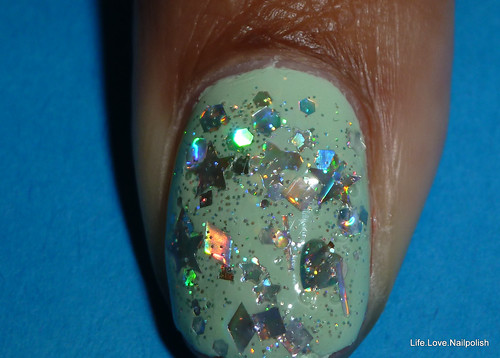
Ummm, yeah. I like this. A lot. I think I got all the shapes on this nail. Who am I kidding? I'll probably use this again and a horse shape will come out the bottle! Do they make horse-shaped glitter? LOL!!
This pic is more color-accurate with the flash, so I've got another one for you to drool over.
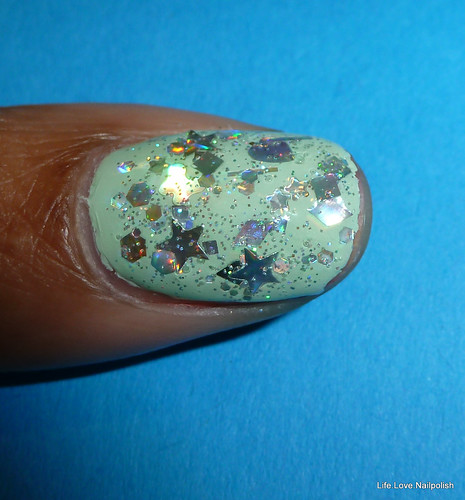
Excuse the weird tip shrinkage. I have no idea what was happening there. You can especially see the butterfly shape here.
Ok, I think I've posted enough pics for one post, so I'll see you around the blogosphere!
J
Subscribe to:
Posts (Atom)